 |
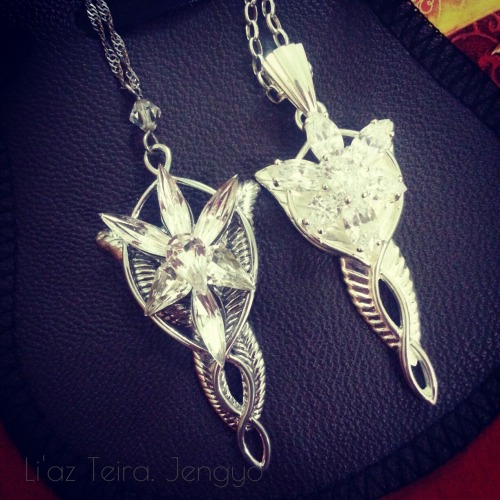
| A Replica and THE Replica |
Now that I've gotten my Evenstar, I'm beginning to show signs of anxiety over the task to protecting it while wanting to wear it all the time like a charm. Sterling silver a.k.a. 925 silver, is an alloy of silver (at least 92.5%) and other metals such as copper. Silver jewelleries are indeed gorgeous, but they do tarnish really easily with time.
I own a couple of 925 pieces myself, which is precisely why I'm cracking my head over the handling of my Evenstar because I really want it to to last a lifetime and treat it with dignity. (Like you know, wearing it on my BIG day with my wedding gown and perhaps till my hair turns silver).
 |
| Some ancient Christmas present (Golden lomo tint) |
*I'll explain that later!*
The only concern I have is that our subject is now an Evenstar that costed a BOMB - and yeah, would my home remedy destroy the Evenstar?
 |
| Monochrome - she's 8 years old this year |
You can now see why I'm anxious. I'm proud of my DIY electrolysis skills but at the same time, my over-achieving attitude might just be the doom of me.
Now, let's finally move on to DIY electrolysis!
Basically, the entire process involves transferring of oxides from your relatively less reactive silver to a more reactive aluminium. Can you guess what are the things we need for this little reaction? YES, it's the wondrous aluminium foil!
Things you'll need:
- A heat tolerant container (a regular ceramic bowl would do, you can even use a cup lol, depending on the size of your silver piece - just be imaginative.)
- A piece of aluminium foil (be environmentally friendly and cut out just a small piece of it, enough to cover your silver piece and keep the rest of the next electrolysis.)
- Boiling water
- Baking soda
- Salt
How-To:
- Mix 2 portions of baking soda to 1 portion of salt (for single use, 2 teaspoon or baking soda to 1 teaspoon of salt) and there you go, the magickal reactant which you can keep for subsequent use!
- Line the bottom of your heat tolerant container with aluminium foil.
- Place your silver piece upon the aluminium foil, ensure that there is contact.
- Add your reactant
- Add boiling water
There should be a sizzling sound and small bubbles rapidly rising from your silver and bubble growing all over your foil. Watch and see how your silver is restored to their previous glory! I do that once every few months.
The difference would usually be instant and drastic - depending on the degree of tarnish. But do take note that there might be some risks if your silver piece comes with gemstones. I can't guarantee they won't crack under the heat!
But you do get the idea don't you? My anxiety about putting my Evenstar through this DIY electrolysis when it does tarnish. But I'm perfectly happy abusing the rest of my accessories because the effect is practically magical and effortless.
Notes:
- Do NOT attempt to rub toothpaste on your silver, abrasion and scratches are definitely unavoidable as silver is a really soft metal. It might help remove some tarnish, but the effects are just too harsh and irreversible.
- Try not to use cloth on your silver unless its a real polish cloth for jewelleries or watches. Personally, I use a nano-cloth which came with my spectacles and I still think it would leave scratches on my silver.
Well, I'll most likely be wearing my Evenstar like a charm on a daily basis since it is made for wear (with a 5-year guarantee). Silver is too gorgeous to be kept for once-in-a-blue-moon occasions and just enjoy while the shine last and cherish your pieces!
Click here for alternatives ways of maintaining your silver :) Do note that the above steps for DIY electrolysis is written base on my own experience over the years.
Good luck and have fun giving your silver the restoration it deserves.


0 comments:
Post a Comment